Banana Bread! (eggfree, glutenfree)

It took social distancing and Covid19 to get me blogging again I guess. Trying not to waste and we live in banana land! So, off I went, scrolling for recipes that are gluten free, egg free, corn free and use bananas. None of the recipes suited me. Im not a fan of powder egg replacer or flax egg. Both banana and chickpea flour can be used as egg replacer right? So. Time to make my own recipe. I will spare you all the details. There was Bread 1, 2 and 3. In the end bread 3 won hands down and this is what Im sharing with you today 🙂

Dont be afraid to experiment, so many recipes call for things we may not have at home. Half the recipe here is bananas anyway so dont stress to much if you add or remove or adjust elsewhere!

You need:

  • 5 Bananas (bananas here are pretty small so you can absolutely use less if you have big ones)
  • 3 tbsp sugar or other sweetener.
  • 1dl chickpea flour
  • 1.5 dl gf flour blend (switch the half for gf oats if you prefer)
  • 1 dl milk
  • 1 tbsp baking powder
  • Cinnamon, to taste. I used about half a tbsp
  • OPTIONAL extra – seeds, gf oats, raisins, whatever you like. Ive done batches with raisins and seeds on top and some with oats inside and all of it works! You dont need any of it, but you can absolutely use your imagination here. Perhaps chocolate chips?

Mash your bananas well. In all my version the bread that turned out the best I used my electric whisk to get all the banana lumps out and the bread turned out the fluffiest, so mash a bit, then get that whisk out!

Add all other ingredients and mix well. Yes, you can do it in any order you like, its absolutely ok!

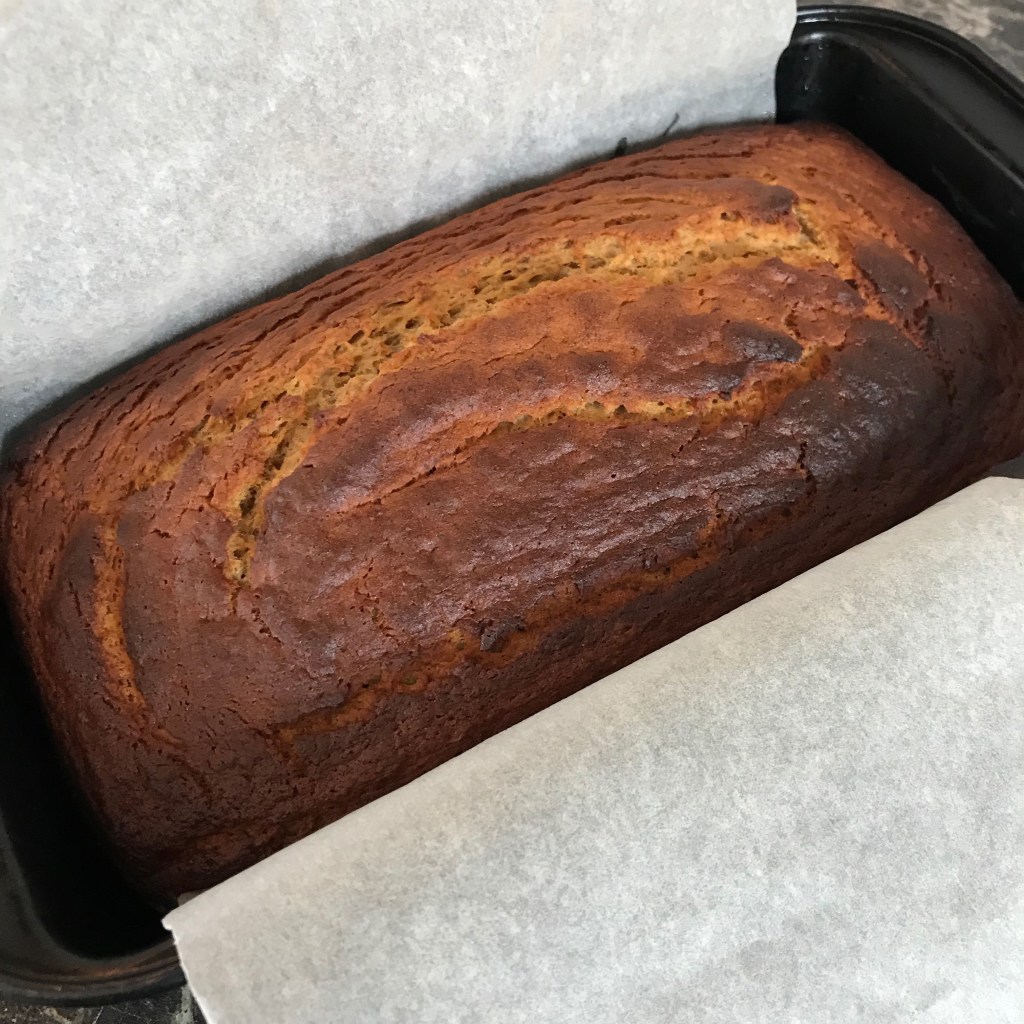
The bananas make this cake (hateword number 1) moist enough on its own, so I added no oil to the batter. I did put some oil on my parchment paper though.

Pop it all in a bread tin and place in a 185 degree (pre heated) oven for 45 minutes.

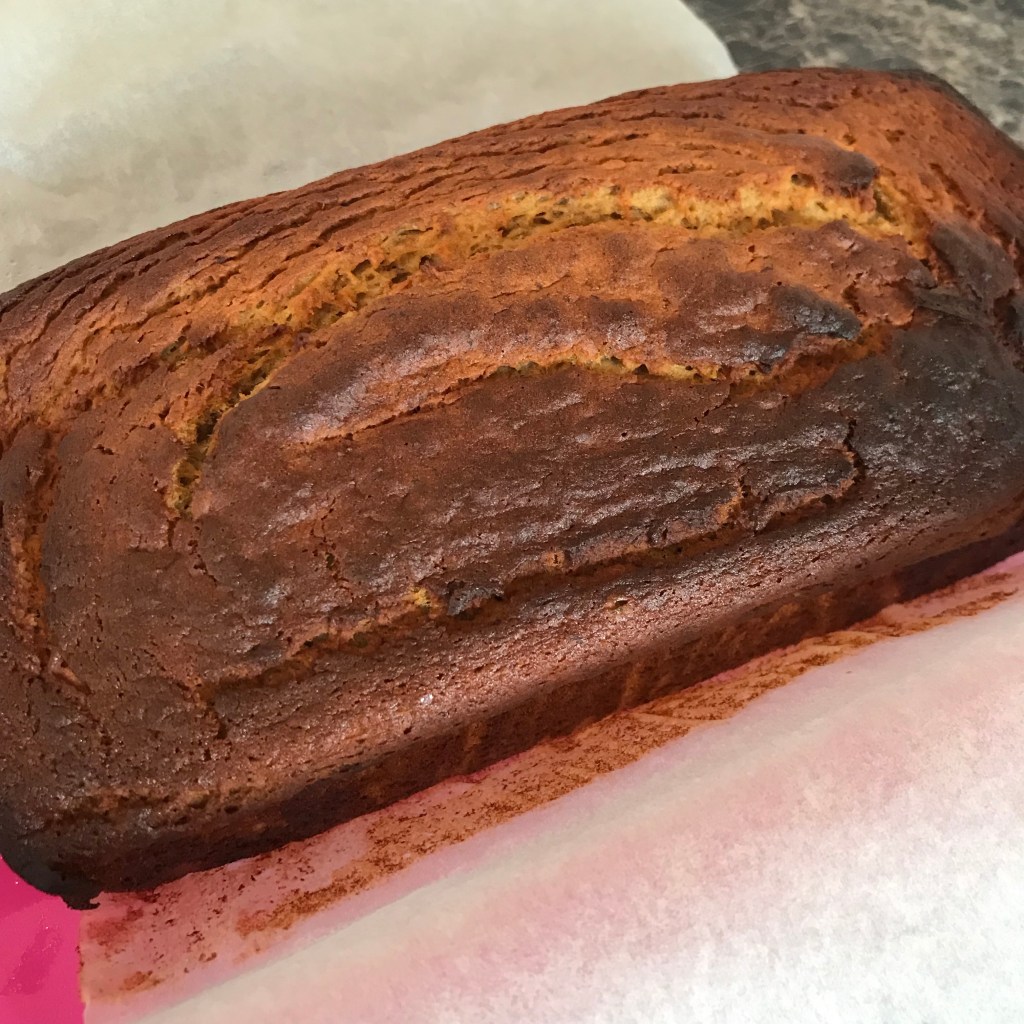
Hot tip, banana bread is BETTER the day after you make it. If you absolutely cant wait though, at least let it cool down before you cut it. All my banana breads end up looking a little burnt, I think its just the caramelising of the bananas? They dont taste burnt 🙂

Enjoy!

On a Pancake mission – Day 3

Its ok that day 3 is almost a year later right? 😀

My sister in law sent me some links to recipes using chick pea water instead of eggs. Pretty cool right? Im sure you have seen some floating around also. Of course being me, I didn’t save any of the recipes she sent me, but who needs a recipe right? I made my own.

This is a small batch (will feed 2-3), double the amounts of flour and milk for a larger batch.

You will need:

  • 1.5 dl gluten free flour
  • 1 tsp baking powder
  • a pinch of salt
  • 1-2 tablespoons of sugar
  • 1.5dl milk
  • 1 egg – or in this case, the “juice” from 1 jar of chick peas.

I used an electric whisk to combine it all and fried my pancakes in butter.

These pancakes were easy to fry, again, careful with the heat, they burn pretty easy! Taste wise they taste like the real thing! Daughter gave them a 5/5 and a visitor (not GF or Egg free) said they taste like pancakes! Cant get much better then that! I really liked these, not doughy at all. My favourite so far!

You cant taste the chickpea juice at all.

Dont forget to “like” GlutenFree & Me on Facebook!


Crazy about Dahl

I have a thing about dahl lately. My kids have a thing about dahl lately too! Sons thing is eating 2-3 bowls of it in one sitting, and daughters thing is refusing to eat any at all. Ho hum, you cant win them all.

Did you know you can make kick ass awesome dahl without having a cupboard full of fancy spices?

Let me teach you my base dahl, then you can play around with it and create your own version.

You will need: (No measurements, sorry, I suck, I know!)

  • Lentils
  • 1 onion
  • 3 garlic cloves
  • tumeric
  • fresh ginger
  • 1-2 tomatoes
  • 1 lemon or lime
  • chilli – optional

for different variations you can add spinnach, chickpeas, paprika, different coloured lentils, carrots…. the sky is the limit 🙂

So, you need lentils. For a starter outer I suggest red lentils. Wash them well and pop them in a large saucepan with water. Id say 2 cups of lentils and 4 of water, add more water if needed. Add about half a teaspoon of tumeric. Bring to a boil and turn the heat down. Red lentils are pretty fast so you can start prepping your other stuff almost straight away.

Finely chop your onion, if you have a kid who thinks onion is poisonous like me, then you can puree the onion in a mini chopper. Its magic. I do this all the time and point blank lie. Works a treat.

Mince your garlic (one of them garlic press majiggys is perfect).

Slice or chop a small amount of chilli, I use red for more colour but use such a minute amount it really doesn’t give much spice at all.  Add the chilli to your garlic pile.

Grate or slice some fresh ginger. I always keep mine in the freezer, so its easy to scrape off the amount I need with a sharp knife. Add the ginger to your garlic and chilli pile.

Cube your tomato. Some say to take the peel off, I dont bother.

Once your lentils are close to done then continue with these final steps.

Add your oil of choice to a frying pan, I use extra virgin olive oil, over low to medium heat fry the onions taking care to not burn them or let them go brown. You want them soft. This will take about 4 minutes. Then add your garlic, chilli, ginger pile. Take extra care now to not let this burn, burnt garlic is not nice.

Once your lentils are done, add all your goodness from your frying pan in to the lentils and also add your tomato. Add salt and squeeze half a lemon or lime in to your dahl.

I like to add a few leaves of baby spinach, it gives such awesome colour.

Once you graduate from this dahl you can start using more grownup lentils and spices if you like 🙂 The one pictured has baby spinach and the lentils are brown and red mix. YUM!

I serve mine with a naughty blob of butter 🙂 You can make it less liquidy and eat it with rice too.

Swedish Coconut Balls!

Yes, I know, this recipe starts out with you doing a double take and going, “coconut balls?????”

All Swedish kids grew up with coconut balls, its not something parents generally make, instead the kids do it, its an activity and a sweet treat all in one. Although in Swedish, kokos bollar doesnt sound so, eeehm…. wrong? lol

Once upon a time some people called this something else that is very very racist, those people are now being told to say chocolate balls instead. Im not sure what all the hu haa is about to begin with, I have always said coconut balls as have most my friends and family. So coconut balls is what you will call them as well 🙂

This recipe will not work if you cant tolerate oats. Make sure you buy proper glutenfree oats and not any old oats, as normal oats can contain a fair amount of gluten.

You will need:

  • 100g butter, room temperature
  • 1.5 dl sugar
  • 3 tablespoons coco powder
  • 1 teaspoon vanilla sugar (scrap this if you dont have it)
  • 2 tablespoons strong coffee (or water if you dont want to risk making the kids hyper)
  • 5 dl GF oats
  • desiccated coconut, for rolling the balls

The rest is really very simple. Add all the ingredients in a bowl and get your kids to mix it.

Really really mix it, squish, sqash, knead, bash….. until its all mixed. Then roll the mix in to small balls which you then roll in coconut. Once done, refrigerate. Then eat. Or eat as you make it. With a spoon. Then you can skip the coconut too 😛

For a healthier version play around with it, add some coconut oil, chia seeds, less sugar etc. The possibilities are endless.

Enjoy!

Beef in paprika and tomato sauce

Another quick and easy staple dinner recipe. Change it up using different veggies.

I used:

  • half an onion (I have kids remember! Use more if you like)
  • 1 green paprika
  • beef, I used two nice steaks and cut them, but you can buy the ready made stroganoff pieces if you like. (NOT braising beef as it takes ages)
  • passata, I used about 250g

If you are serving this with rice then the sauce takes about the same time as a pot of basmati rice to cook, so get the rice going then make the sauce 🙂

Frying pan on hot, add olive oil (extra virgin obviously, never fry in any other olive oil) then pop the beef in (don’t wait to heat the olive oil as it ruins the oils flavour). Add salt & pepper. Once the beef has sealed (that means its gone a nice brown on all sides) add your onions and paprika and turn the heat down to medium. Once the onion has gone soft add your passata and a teeny bit of water, if you like you can add half a stock cube at this point, I usually do, but no need. If you do, make sure its organic and gluten free!

Simmer the sauce until the paprika is soft but not soggy, if you have that rice going then the sauce should be done around the time you drain the rice 🙂

The kids eat this with Rice, I eat mine with some cabbage, or on its own to make it LCHF.

Enjoy 🙂

Linda

Easy Peasy Orange chicken (that doesn’t taste of orange!)

Im bad at writing recipes, but good at cooking, so here we go, Im continuing with easy simple stuff that anyone can make 🙂 Real food baby, its the way to go. And real food doesn’t have to be hard at all!

Ideally to make a gourmet meal of chicken you should marinade, but hey, Im a busy mum of 2, running a gluten free house and I hardly have time to shower some days let alone think ahead to marinade stuff in advance! So, keeping it simple here. My kids love and adore this chicken, and so does anyone else that eats it, and its so super simple!

I used:

  • 4 good size chicken thighs (you can use drumsticks or whatever you like)
  • extra virgin olive oil
  • half an orange

Pop your Chicken in an oven pan, salt and pepper and drizzle with olive oil. Then squeeze the juice of half an orange on top. Bung it in the oven 175º degrees for 45 minutes.

Thats it. Like really. I mean it 😉

This particular batch Im keeping in the fridge (juices from pan included) to make a quick dinner with after sons football game tomorrow. you could serve it as is with rice and veggies and a sauce or use it for salads or lunch boxes, anything goes.

Enjoy 🙂

Linda

Pssst, if you want to make sure you never miss an update, subscribe to the blog or give us a ‘like’ on Facebook 🙂 https://www.facebook.com/glutenfreeandme

Goji Berry and Blue Cheese Salad

Originally Posted on Gluten Free UAE in January 2012

Just my kind of meal, no cooking required!

You will need:
Baby Spinach
Blue Cheese (I used Cambozola, its rich and creamy and perfect for this salad, any blue cheese will do, just be careful as although most are gluten free some are not)
Tomatoes
Goji Berries

Rinse your spinach well and get rid of any big stems by pinching them off.
Roughly chop your tomatoes and cut the cheese in to cubes.
Line your plate with the spinach, top with the tomatoes and cheese and finally, throw on a handful of Goji berries.

I drizzle mine with some extra virgin olive oil, then add some salt & black pepper.

Thats it 🙂 Enjoy!

-Linda

Swedish Style Birthday Cake (Cream Cake)

Image

Originally Posted on Gluten Free UAE in January 2012

It was my sons birthday over Eid and I wanted to make him a traditional Swedish cake, this is what we always make for all our birthdays, but this was my first gluten free version. I cheated a little but it was very yummy so I thought I would share 🙂

You will need:
2 Mrs Crimbles Muffin & sponge mix (Lulu’s & Spinneys sell these)
Whipping cream
Strawberries or other fruit for decorating
Chocolate cream or strawberry jam
For chocolate cream, mix 3 table spoons coco powder with 3 table spoons sugar and stir with cream until its a buttery consistency (keep adding cream as needed), if you like it sweeter just add some extra sugar.

Follow the instructions on the Mrs Crimbles mix and add the mix to two breaded tins. (1 mix per tim)
I only have one round tin, so I did my cakes one at a time. Thats fine too 🙂 (For the breading I always use gluten free cornflakes that I wizz in my mini chopper for 30 seconds or so. Much cheaper then any shop bought bread mix and tastes nice too, make sure you use butter and not low fat oil, this is birthday cake after all)
Let your two cakes cool.
Assemble your cake just before serving, so if you have baked the cake parts the night before, just cover in plastic and leave them.
To assemble, pop one cake on a tray and put your chosen filling on, you can use gf custard, chocolate cream or any jam you like. Its usually strawberry jam, but my son wanted chocolate so thats what we did.  Once its somewhat even, add your second layer of cake on top.
Whip your cream with half a spoon of sugar or some vanilla essence if you like it better.
Cover the entire cake in whipped cream. You can make it all pretty if you know how, or you can just add it all in any way you like and smooth it with a spatula. Add your strawberries to decorate your cake. Serve!

You can offcourse use any other sponge mix or make your own, I liked the Mrs crimbles one, it was easy to make and tasted good. Apologies for the bad photo, it was taken in hindsight rather then to showcase the cake. Oops 😛

-Linda

Who needs an oven? Cake in 5 minutes!

There I was stressing about the cake, ran around several shops yesterday morning to try to get a whisk, a mini chopper, essentials you know. But in the end, the cake became a trusted old ice cream cake made with nothing other then a spoon and a hand whisk using 2 ingredients! Sure, it may not have been super stunning (although the kids thought it was) but it sure was super delicious!

So heres a recipe for you. You need;

  • 1 tub of ice cream (I used chocolate chip)
  • whipping cream
  • decorations

You need to;

  • Spoon ice cream on to a plate or tray, you have to work fast so it doesn’t melt to much. Mould it in to some kind of shape. I wanted round so round it was.
  • Carefully spread your whipped cream on top, and cover the whole thing. If you know how to make it pretty, by all means, go ahead 😉
  • Decorate with berries or sweets or even gluten free Oreos!

Pop the ‘cake’ in the freezer for at least 10 minutes to harden a little. Don’t go crazy or the cream gets very hard.

TADAAA!!

Image

Another birthday taken care of, who needs super pretty when its super yum?

-Linda

Like this cake? Also find and like us on Facebook! www.facebook.com/glutenfreeandme 🙂